Flutter : Google Maps API in Flutter
Creating API Keys
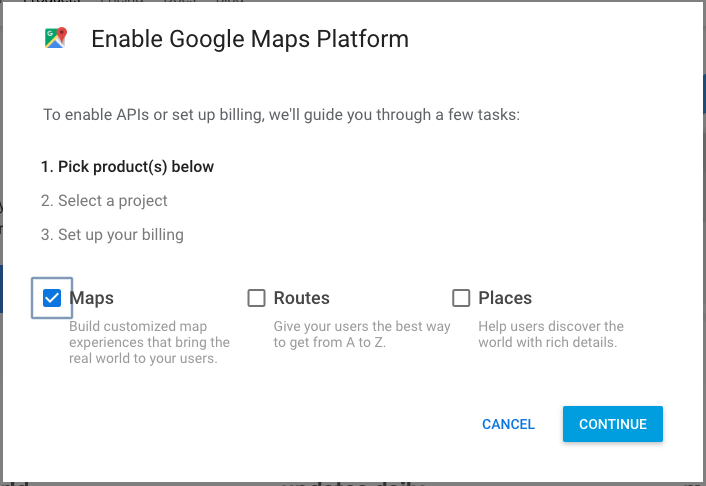
In order to get started with Google Maps you first need to create an API key for your new project. To create an API key navigate to the Google Maps and click GET STARTED to step through the wizard to set up your API key.
On the following screens you need to:
- Enable Google Maps API.
- Create a new project called Flutter Maps.
- Choose a billing account (don’t worry there is a free tier to use).

Maps API Key wizard
Once, you have successfully created your API key make sure to copy it and save it someplace, as you will need to add it into your Flutter app.
Adding the Google Maps Plugin
To get started using Google Maps Plugin open the pubspec.yaml file and under dev_dependencies paste the following, using the same indentation as flutter_test::
google_maps_flutter:
Be sure to run Packages get after you make this change.
Adding the GoogleMap Widget
Open lib ‣ places_search_map.dart and add these two member variables to _PlacesSearchMapSample, resolving the imports with package:google_maps_flutter/google_maps_flutter.dart:
// 1
Completer<GoogleMapController> _controller = Completer();
// 2
static final CameraPosition _myLocation =
  CameraPosition(target: LatLng(0, 0),);
Here you have:
- Defined the callback for the completion of creating the map.
- Created the map’s initial camera position (where to focus on the map).
Then, replace the contents of the build() method with the following code:
return Scaffold(
  // 1
  body: GoogleMap(
    // 2
    initialCameraPosition: _myLocation,
    // 3
    mapType: MapType.normal,
    // 4
    onMapCreated: (GoogleMapController controller) {
      _controller.complete(controller);
    },
  ),
);
Here you have:
- Included the
GoogleMapwidget as the body of yourScaffoldwidget. - Set the initial camera position
- Set the
mapTypeto normal. - Added a callback to listen for the creation of the Map widget.
Finally run your app using the normal means in your IDE, or by typing the following command into the terminal in the project root:
flutter run


Comments
Post a Comment